Step by Step guidance on how to change WiFi Network and Password on your Show Device
To update the WiFi credentials on a Show Device you will need to temporarily remove the Device Serial Number (DSN) from the SmartHost system so that it can return to the Amazon Provisioning Account.
Account settings on show devices are disabled once it is moved into the SmartHost hospitality account.
Go to Account ➤ Devices
Search for the DSN that you want to update.

Un-associate DSN from property by selecting the un-associate button. The device must be online for the un-association process to be enabled. It will take the system 2 minutes to update.

After un-association is completed and device status appears online again. Remove DSN from SmartHost Management Portal by selecting the delete button.
On the Show device slide your finger from top to of screen downward till various icons appear. If no WiFi icon appears in top right corner you can also select it. Selecting No WiFi image will take you directly to available WiFi networks.
Select Settings Icon
To change the network association for the device, select the Settings > Network. It will display the current WiFi Network below the Network header.

Use the screen to select the appropriate WiFi network.
Use device keyboard to add WiFi password
Device will ask you to confirm your Amazon Provisioning account password. Follow the instructions.

Allow a couple of minutes for the device to update WiFi credentials and re-associate to the Amazon Provisioning Account.
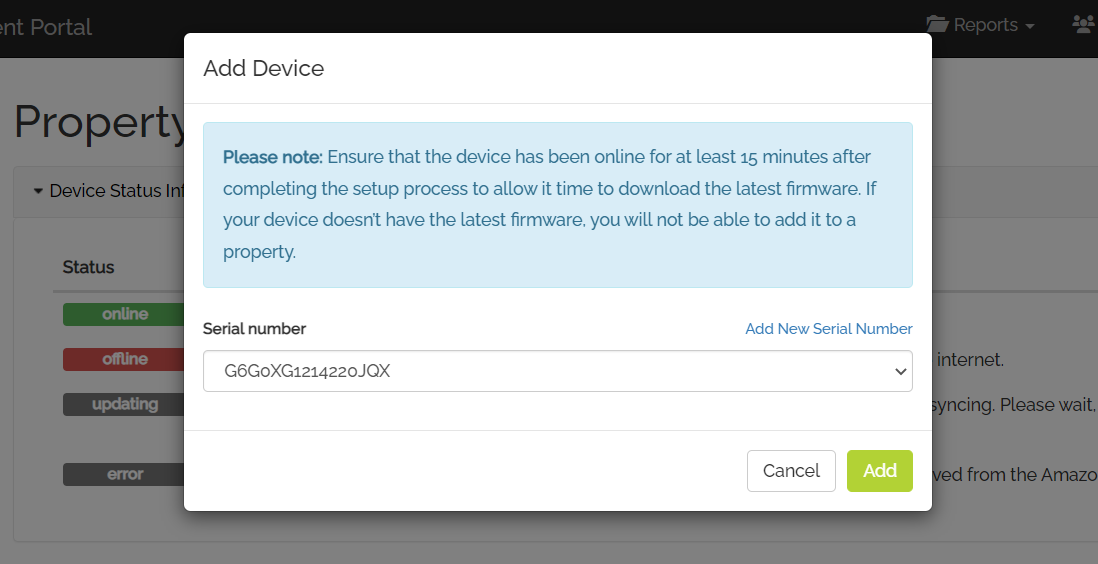
Add Device
After you have updated the WiFi credentials, you need to add the DSN for the device back into SmartHost Management Portal and associate it to a property.
Steps to Add DSN and Associate Property in Account:
Go to Account ➤ Devices


| Select Action Button |  |
| Select Add Device |  |
The DSN(s) that are currently active in your Amazon Provisioning Account will appear in the drop-down menu under Serial number header. Keep in mind:
- Newly added installed devices will need to go through the entire setup process for association to the Amazon Provisioning Account before they will appear in the drop-down menu in SmartHost.
- If you have more than one DSN in the Amazon Provisioning Account they will all appear in the drop-down menu. Select the arrow down button to see all available DSNs.

Select the DSN and corresponding property you want associated with each other, then select the Add button. Takes two minutes for the association process to complete.
Steps to Add DSN at Property Level:
Select Property that you want to associate DSN then select Devices tab on left Menu

| Select Action Button |  |
| Select Add Device |  |
Select the DSN Serial number you want associated to the property.
Takes two minutes for the association process to complete.
Need to report a WiFi issue?
Submit your request here.