For additional assistance or questions, please contact us at SmartHostHelp@Xplorie.com
Pre-Installation

| Apple Store | Android Store |
 |
 |
The Installer must have access to the Wi-Fi network and password for the applicable vacation rental. You must log into your specific Xplorie Amazon Provisioning account.
If you have a personal account, that you are typically logged into, you will need to log out of it. Then you can log into your SmartHost linked Amazon Provisioning Account.
- Log into your Amazon Provisioning Account.
- Username: businessname@xplorie.com
- Password: 123456x
If approval is required, please let the Client Success team know.
Once you log in, you can select SKIP or NOT NOW to every question.
|
|
Do not add any personal information | Choose the main name provided on account as your identity |
 |
 |
 |
 |
On-Property Installation
What You Need For Installation at Property:
- Dot Device
- WiFi Credentials for Property (Network and Password)
- Laptop, tablet, smartphone, or support personnel with internet access.
- SmartHost Login and Password
Upon Arrival at Property:
- Unpackage Dot Device and connect power cord
- In the Alexa App, Click
(located at bottom right corner) and choose Add Device.
- Choose 'Echo Dot' as the new device type; and follow the steps to add the device to the Wi-Fi network of the vacation rental. (Note: The Echo Dot will have an orange ring when it goes into set-up mode.)
- The Device should notify you that it is connected to the internet. To confirm, simply ask a question such as "Hey Alexa, what time is it?"
The App is used as the vehicle to connect the device to the internet. Once the device migrates into the SmartHost system it will disappear from the App. There is no need to add any property -specific information (such as the address) into the App.
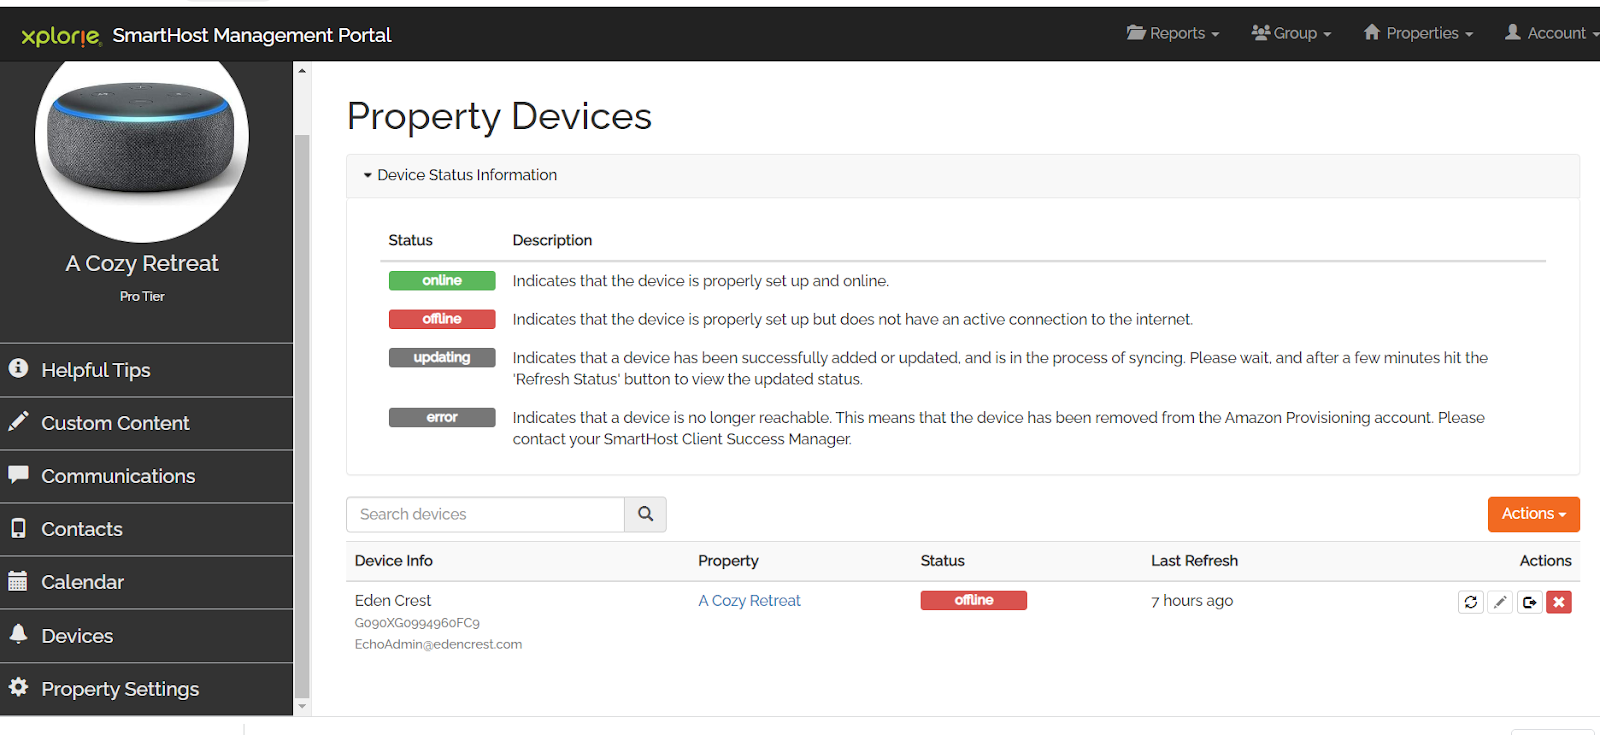
Turn Amazon device into a SmartHost
On your laptop, tablet or phone, login to your SmartHost Management Portal.
- Username: businessname@xplorie.com
- Password: 123456x
There are two ways to add the DSN and select the property you want it associated to within the system. At Account level or at the Property level.
Steps to Add DSN and Associate Property at Account level:
| Go to Account ➤ Devices |  |

| Select Action Button |  |
| Select Add Device |  |
The DSN(s) that are currently active in your Amazon Provisioning Account will appear in the drop-down menu under Serial number header. Keep in mind:
- Newly added installed devices will need to go through the entire setup process for association to the Amazon Provisioning Account before they will appear in the drop-down menu in SmartHost.
- If you have more than one DSN in the Amazon Provisioning Account they will all appear in the drop-down menu. Select the arrow down button to see all available DSNs.

Select the DSN and corresponding property you want associated with each other, then select the Add button. Takes two minutes for the association process to complete.
Steps to Add DSN at Property Level:
Select Property that you want to associate DSN then select Devices tab on left Menu
Select Action Button |
|
| Select Add Device | |

Select the DSN you want associated to the property.
Takes two minutes for the association process to complete.
IMPORTANT: Make sure the DSN for the physical device that is being installed at the property matches the DSN you have assigned within the Management Portal for said property.
Need assistance associating a DSN?
Submit request here.