Our Device Serial Number (DSN) drop-down feature makes adding a device to a property super easy
Below, we provide step-by-step instructions for adding a DSN and associating a property in your account.
1. Go to account ➤ devices


2. Select "actions" button.

3. Select "add device" from the drop-down menu.
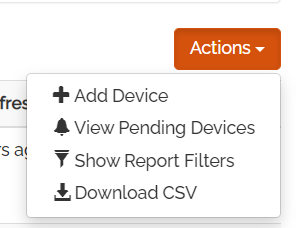
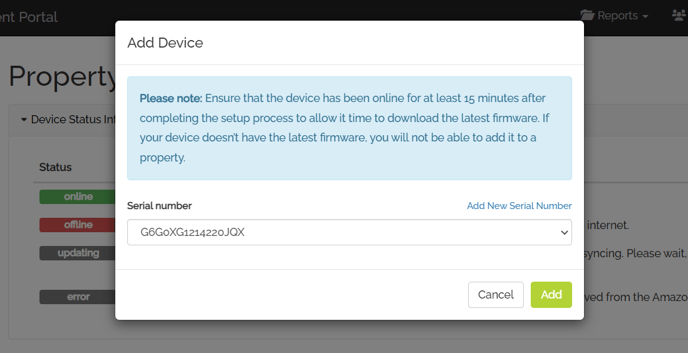
The DSN(s) that are currently active in your Amazon Provisioning Account will appear in the drop-down menu under the Serial number header. Keep in mind:
Newly installed devices MUST go through the entire setup process for association to the Amazon Provisioning Account. Allow device to fully complete installation process to avoid activation issues. After the device says that installation is complete, you may add DSN to SmartHost.
If you have more than one DSN in the Amazon Provisioning Account they will all appear in the drop-down menu. Select the arrow down button to see all available DSNs.
4. Select the DSN and corresponding property, then click the "add" button.

Note: it will take approximately two minutes for the association process to complete.
Need a little more help? Check out the video:
If you'd like to add a DSN at the property level, follow the instructions below:
1. Select the property that you'd like to associate with the DSN, then select the "devices" tab from the left-hand menu.

2. Select "actions" button.
3. Select "add device" from the drop-down menu.
4. Select the DSN you'd like to associate with the property and click the "add" button.
Note: it will take approximately two minutes for the association process to complete.
If you have any questions, contact your Client Success Team at clientsuccess@xplorie.com